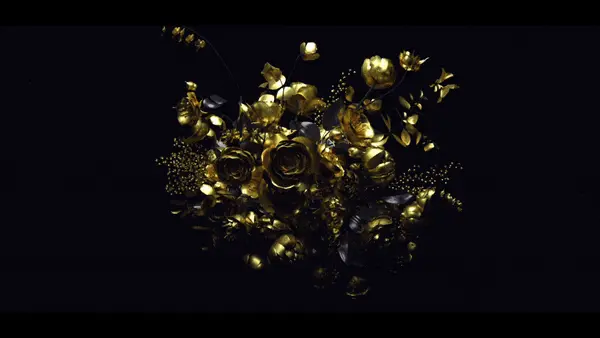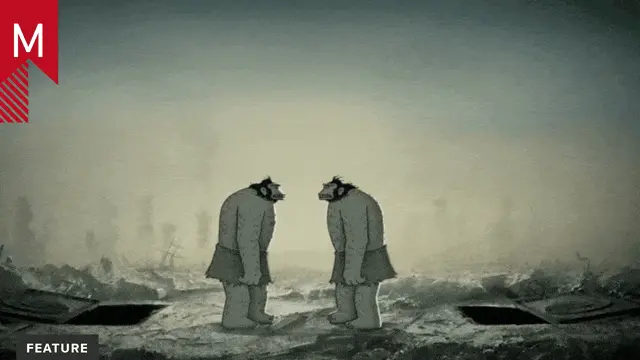
It’s happened to you at least once — a color explosion on your screen created by an ill-fated download or a codec mismatch. A compression algorithm slip-up can introduce surprising colors and patterns but retain strange motion memories of the original video.
A little over a week ago, Ray Tintori premiered his music video for Chairlift’s “Evident Utensil”, which wrangles the technique, “data moshing,” into a fun, effortless, mind-bending trip with the members of Chairlift. Every time you start to wrap your head around whats happening, the band breaks through the frame, tearing the pixels with them.
A couple days ago, another data moshing video was released — much to the debate of the internet echo chamber. Directed by NABIL, Kanye West’s “Welcome to Heartbreak” has a grittier take on the datamoshing technique. Ghost Town Media contributed the post effects and look like they had a really good time dragging the footage through the digital wringer.
Both parties acknowledge Takeshi Murata as a key influence. In Monster Movie and Untitled (Pink Dot), Murata used 80s movies Caveman and Rambo: First Blood as moshing fodder. The only video documentation I’ve been able to find is on YouTube — it’s quite impressive, though it’s hard to tell which compression artifacting is from the original and which is added on for extra YouTube flavor. Murata is still making artwork and gave a screening/talk last Tuesday in New York that I’m sad I missed.
Other artists who have explored datamoshing include PaperRad, David O’Reilly, Owi Mahn & Laura Baginski, Kris Moyes, and Sven König. The technique also brings to mind more painterly pixel-bleeding artists such as Robert Seidel and Takagi Masakatsu, who I’m not sure used the same process, but give a similar feeling, especially Masakatsu’s Bloomy Girls.
As with any technique, there’s probably more people than the ones mentioned who have tinkered but we’ve tried to link to many of the pixel explorers — please fill in any blanks in the comments.

We were fortunate enough to get a thorough overview of the process behind the Kanye “Welcome to Heartbreak” music video from Ghost Town Media. A special thanks to Matt Primm and everyone at Ghost Town for taking the time to share their pixel-tripping story…

Moshing with Kanye from Ghost Town Media
Background
We started our foray into the data mosh with a video we did with Ray Tintori for the band MGMT. He and we had seen a lot of artists, such as Takeshi Murata and Ben Hernstrom, as well as others trying out a lot of different really cool compression hacking videos. We worked with him to come up with a way of using what they had pioneered to bring it into the pop cultural realm.
During this process we actually were in contact with folks like Bob Weisz who were tinkering with the process as well and we were bouncing ideas back and forth during the post process on MGMT – Electric Feel when we were trying to incorporate this mosh technique into the video. Another resource we had found when the whole process started was aPpRoPiRaTe! which had some great information to help create the building blocks of the process.
When we showed a final version of the video, MGMT and the Executives didn’t like the effect so the only version of that video exists on our website and doesn’t feature all that much data moshing. After a couple of months some other directors took notice of some of the tests we had done for MGMT – Electric Feel and showed some interest in trying to more heavily incorporate the technique into a future project.
We tried for a long time to get it into videos with different artists but no one wanted to take the chance. After some time had passed, Nabil was able to contact Kanye which kicked off the whole process. Kanye loved the idea and he felt the digital nature of the technique worked with his new album, which had a great deal of distortion and digital effects on it.
Shooting and Editing: Anticipating the Mosh
We talked at length with Nabil and thought through as many elements to film as we could that we initially thought might work well with how we understood the mosh process working. Nabil wanted to choreograph the movements of Kanye and Cudi in a way that would give us the most leeway with how the mosh effect works.
The shoot was completely green screen because everyone wanted to be able to control all parts of the performance and content because when the footage was compiled, it gave us the most freedom to do more than the mosh itself, but also allowed us to bring in other software and vfx styles to complement and accentuate what the broken footage was doing.
Motionographer Edit: Here’s some new input direct from Nabil on the shoot:
That video is definitely revolved more around that technique as a whole in its simplest form. I wanted to use it more of strategic way, using calculated moshes, colors and textures to compliment the effect. Different parts of the songs represented different feelings and I wanted to come with a visual representation of the flow and textures that are I feel are very important in this song. I shot different things in super slow motion with the Phantom just for transitional movement and textures. For example at 1:05 that is a balloon filled with red glitter and flour exploding that creates the mosh that breaks through…and at 2:11 that is really a rock breaking through a big sheet of glass a few feet in front of the camera. I had 2 pieces of glass and Eric the production designer had 2 chances to throw it right, and he did. At 2:32 those balls of light that are wiping Kanye are sparks from a grinder I shot hitting a pieces of metal, and aimed the sparks right at the lens. Ghosttown and i sat down and experimented with how each explosion, flare and wipe could be most dynamic in the video.
Once we got the footage in, we edited the video with the concepts of mosh in mind and the fact that we knew things were going to change. When I say that we edited with the concepts of mosh in mind, I mean that we knew somewhat of what the mosh would do based on the shots interacting with one another (relative screen position, movement of shots etc.).
We had some idea that some shots would lend themselves to crazier more distorted changes while others would be more subtle. Once we got through the edit, even though we knew we’d be changing it, we prepped it as though it were the final cut. This would serve as the basis for the rest of the video. It was an edit that went through the entire video.
The way we prepped it (a process that will be discussed further) is basically adding a frame to the beginning of every cut or every mosh that we knew we’d do. So some of the edits were in what would become a seamless shot later. If a long shot had a beat that we wanted to hit with a mosh we’d cut it at the beat and add a frame. Once we were done with that, we prepped it for vfx and from then on we’d have to go through an entire 24 hour process of what I’m about to discuss before we could hear it in sync.

From Flying Blind in VFX land to Following the Rabbit
Once it went to vfx, it became really interesting. Basically, we went shot by shot through the video adding and trying different effects to enhance the mosh and enhance the movement of the video. We were using vfx to tell the narrative of the video.
We knew right away that we wanted the video to be dark and industrial and have a great amount of throwback video effects. So that is the basis that we started from. It felt right because the music was so digital and dark. We jumped in head first and started doing some tests with the beginning of the video.
Initially, we were flying blind in VFX land. Usually, when we’re done with vfx and color you know what the final product will be, but in this case vfx was step 2 in a 5 step process. The only thing we knew would stay would be the color palette and general motion we were animating. It took us several versions of the video to really be in a place where we could accurately predict what the mosh would do. This, in turn, affected the edit substantially so we tweaked where we needed to and then got grinding from there.
It was really important for us that this wasn’t just a video based on the pixel-bending technique, if so there really would be no need to make this, we feel like we needed to bring something new to this genre. The video quickly became more about breakage and failure in that we wanted to find different areas in which the failures in technology are quite beautiful. We approached this less as a vfx piece and more of graphic design project as the compositions would be paramount in sustaining the video.
Kanye himself kind of becomes a white rabbit as the viewer is almost playing a game of trying to guess where Kanye might pop out of next. The overall process was much more fluid than post usually is and while it certainly had some frustrating points where something didn’t mosh the way you wanted it to, but there were also so many moments where it just blew us away unexpectedly.
The moshing process essentially became an extra active member in the project as no two renders were ever identical, each one breaking in its own unique way, it felt at time more of a lab experiment than anything else, which was fun.

The Nitty Gritty: I Frames and Delta Frames
Now we will go into the process. Once they rendered the first tests we went head first into the data mosh. Basically, the way we did it is we made the test with no compression and no audio. As we were testing, the audio screwed up the compression so it wouldn’t come out correctly. So we made the no compression quicktime and then we took it into a program that upped the data rate significantly and compressed it into an avi codec. What happens at this step is that it enunciates each cut to be an I frame.
An I frame or key frame is a frame that holds all the information for color and structure for a series of other frames called delta frames. Basically, the I frame happens at the beginning of a cut and after that there are delta frames that move the key frame through time. Imagine a video of a man who raises his hand. The key frame would be the first frame and its like a picture of the man. All the frames after that would just be the color information and structure of the actual hand being raised.
That is how you can compress videos to such small sizes. It does not have all the information for each frame it just deals with the changes that occur from that frame to the next key frame. whhooohh. thats a mouthful.
Motionographer Note: Sven König, who made the aforementioned aPpRoPiRaTe!, has a really great tool for exploring delta frames here, where you can step through a sample clip to see the pixels codecs come up with in order to save bandwidth while (hopefully) maintaining image quality.
Anyway, once we had our avi compressed version of the video it went from about 7 or 8GB in no compression to about 125MB in its compressed form. Then we’d take this compressed avi and bring it into another program that would illustrate for us all of the key frames. Then it was as simple as going through the entire video and finding all of the key frames and simply deleting them.
It was a bit harder than this though because of the fact that many of the shots that were continuous shots didn’t always have key frames even though we had made cuts so we really had to be precise with which frames we took out or else we’d constantly be going in and out of sync and taking content out that we wanted and other such mishaps. Suffice it to say there were many times when this terribly tedious process had to be redone.
After we had our perfect mosh we’d bring it back into Final Cut and Final Cut did not like this so we’d have to render out the entire video still before we could see it. Final Cut on a nice new machine took about six hours to fully render the video back out to uncompressed quicktime. That is when we could get some sleep during the 24 hour process. Once we were done rendering, we could see all of our mistakes but also everything that looked so amazing. Then we’d get happy accidents and sad redos but with each time we got better and better with fixing and estimating what would happen.
After we’d get through with a full version, we’d bring it back into After Effects and use our green screen footage and digital effects to clean certain parts that Nabil and Kanye felt were too much. Also, we’d be able to throw in more data moshes or enhance a scene even more. In all, we went through about 45-50 different versions of the video. Each one getting a little closer to the goal.
Technique vs. Idea
In regards to the simultaneous release, we believe it was simply coincidence. Any other communication that may have come out about the project before it was released is simply beyond us. We have spent months working on this video (starting somewhere around October when the concept and opportunity came into play with Nabil) and after having the video largely complete in early January we spent from then til now finalizing and perfecting the video.
In the end, this video features a fun new technique. The term technique is specifically used instead of idea, an idea is a concept, a story, a sequence. We don’t claim to be the first to have done this, we’d be deluded to say that. As always we stand on the shoulders of giants like Moyes and Murata all we can hope is that we have added another semi successful example of this process.
We’re kind of a strange hybrid of gearheads and artist over here, we felt this technique was a great opportunity to play with both sides of our interests. We don’t covet the process, actually quite the opposite, we hope that people keep doing this, we kind of want to see what’s next. We’d be thrilled if we see a new slew of videos with this effect on there. Nothing is sacred in this industry, certainly not techniques, it all comes down to just doing it, if it’s good, people will see it and people will like it. Love it or hate it we just hope it makes an impression.

Welcome to Heartbreak Credits
Artist: Kanye West
Track: Welcome to Heartbreak
Label: Island / Def Jam
Director: NABIL
Executive Producer: Jeff Pantaleo
Producer: Kathleen Heffernan, Kelley Gould
Production Company: Partizan
DP: Josh Reis
Production Designer: Eric Archer
Stylist: Theodore Gilliam
Editor and Compression Effects: Ryan Treese Bartley
Visual Effects and Design: Jeff Lichtfuss and Brandon Parvini
Post: Ghost Town Media

Evident Utensil Credits
Artist: Chairlift
Track: Evident Utensil
Label: Columbia
Director: Ray Tintori
Producer/Editor: Bob Weisz
Production Company: Court 13 Omnimedia
DP: Robert Leitzell
Visual Effects: Robert Leitzell and Jordan Fish
Styling: Lizzy Owens and Willow Mayer
Note: Credits for both videos gathered from a couple different sources, including Video Static and Chairlift’s MySpace. Please email if you have any modifications.


